
Below is a list of projects that are saved in your browser. To begin, add a project by clicking the "Start a New Project" button. This will add it to your project list.
You can also open a saved project (.est) file from your device with the "Open Project From Device" button, which will load into the list.
You can save a project to your device's downloads folder by using the download button after selecting a project, or at any point in the tool by going under "Save' -> "Download Project File" at the top of the page.
Once a project is selected in your project list, use the blue arrow button in the lower righthand corner to advance.

Useful Resources


Select the type of soil being retained:
The soil behind the wall is a critical part of the total structure. You will need to select what soil you have on your project.
Select the condition above the wall:


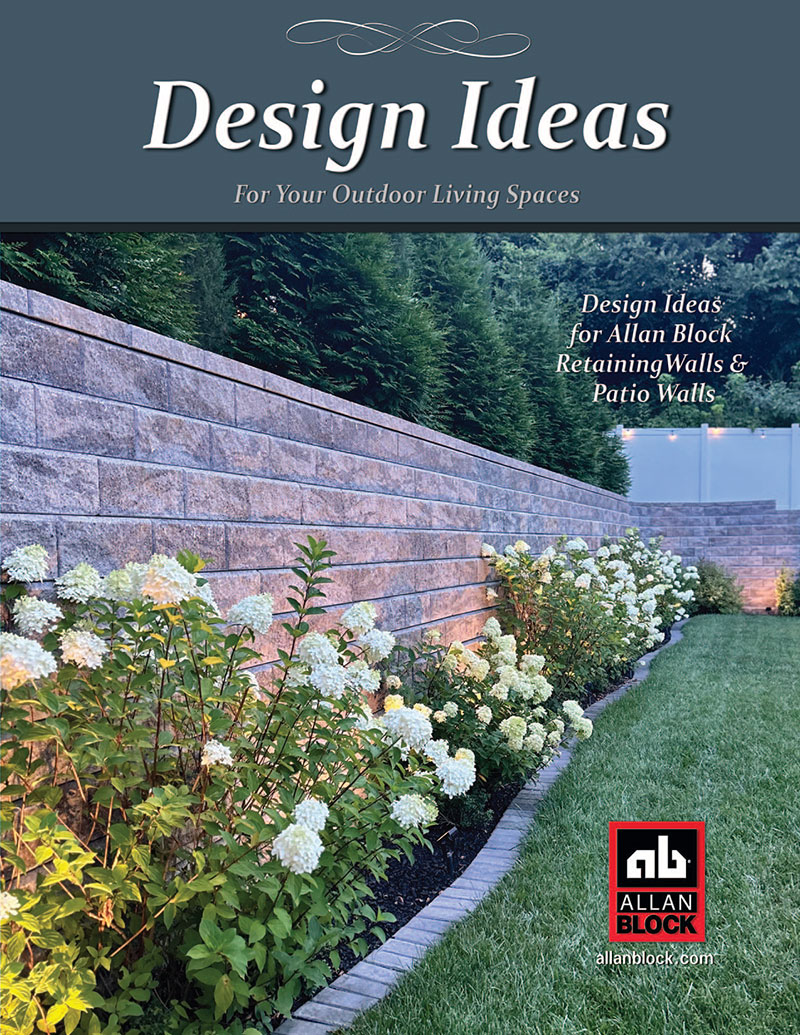
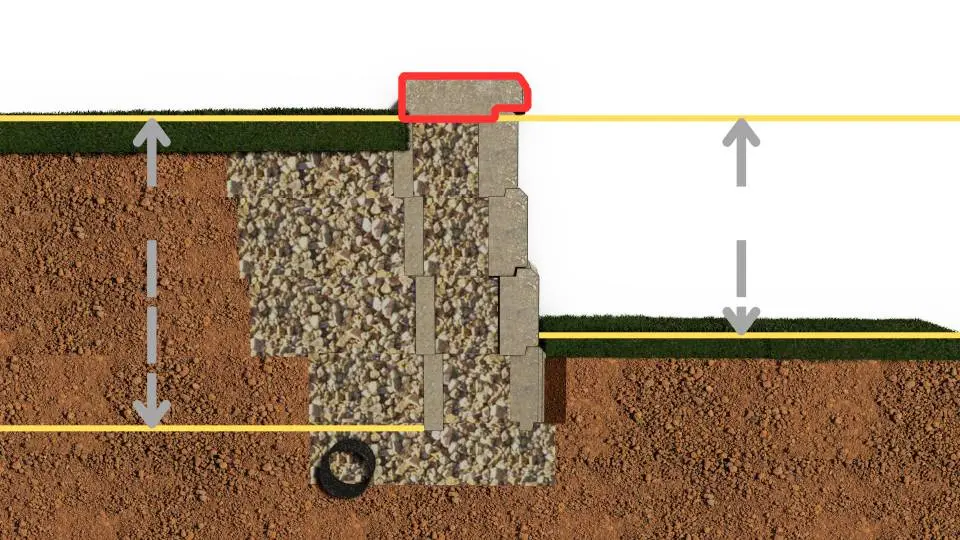
Enter the Exposed Maximum Wall Height
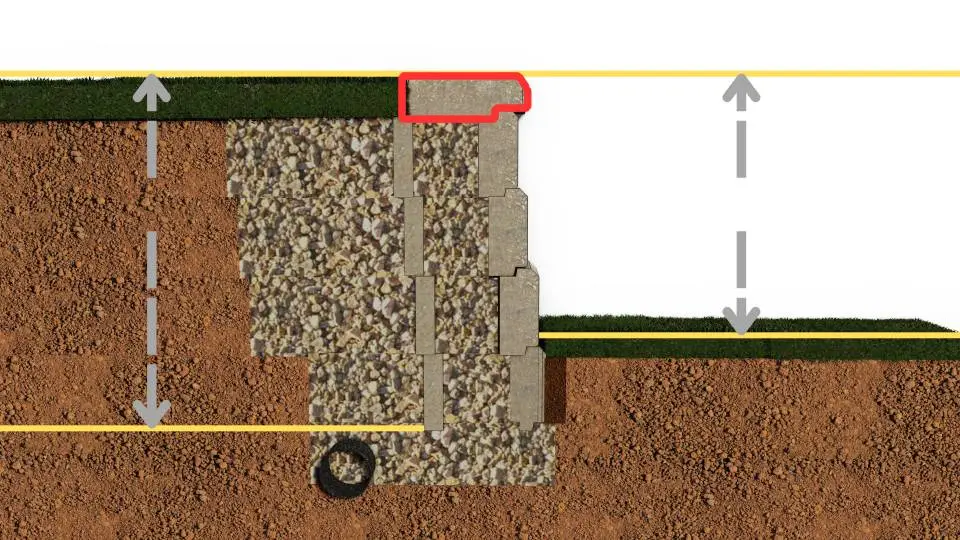
Enter the Number of Station Points
Choose Length Input Method
How will you enter the length of the wall?
Pick Height Input Method
How will you enter the height at each station point?
check_circle Setup Complete
help Help & Reference
Reference Examples

Quick Definitions
library_books Reference Documents
|
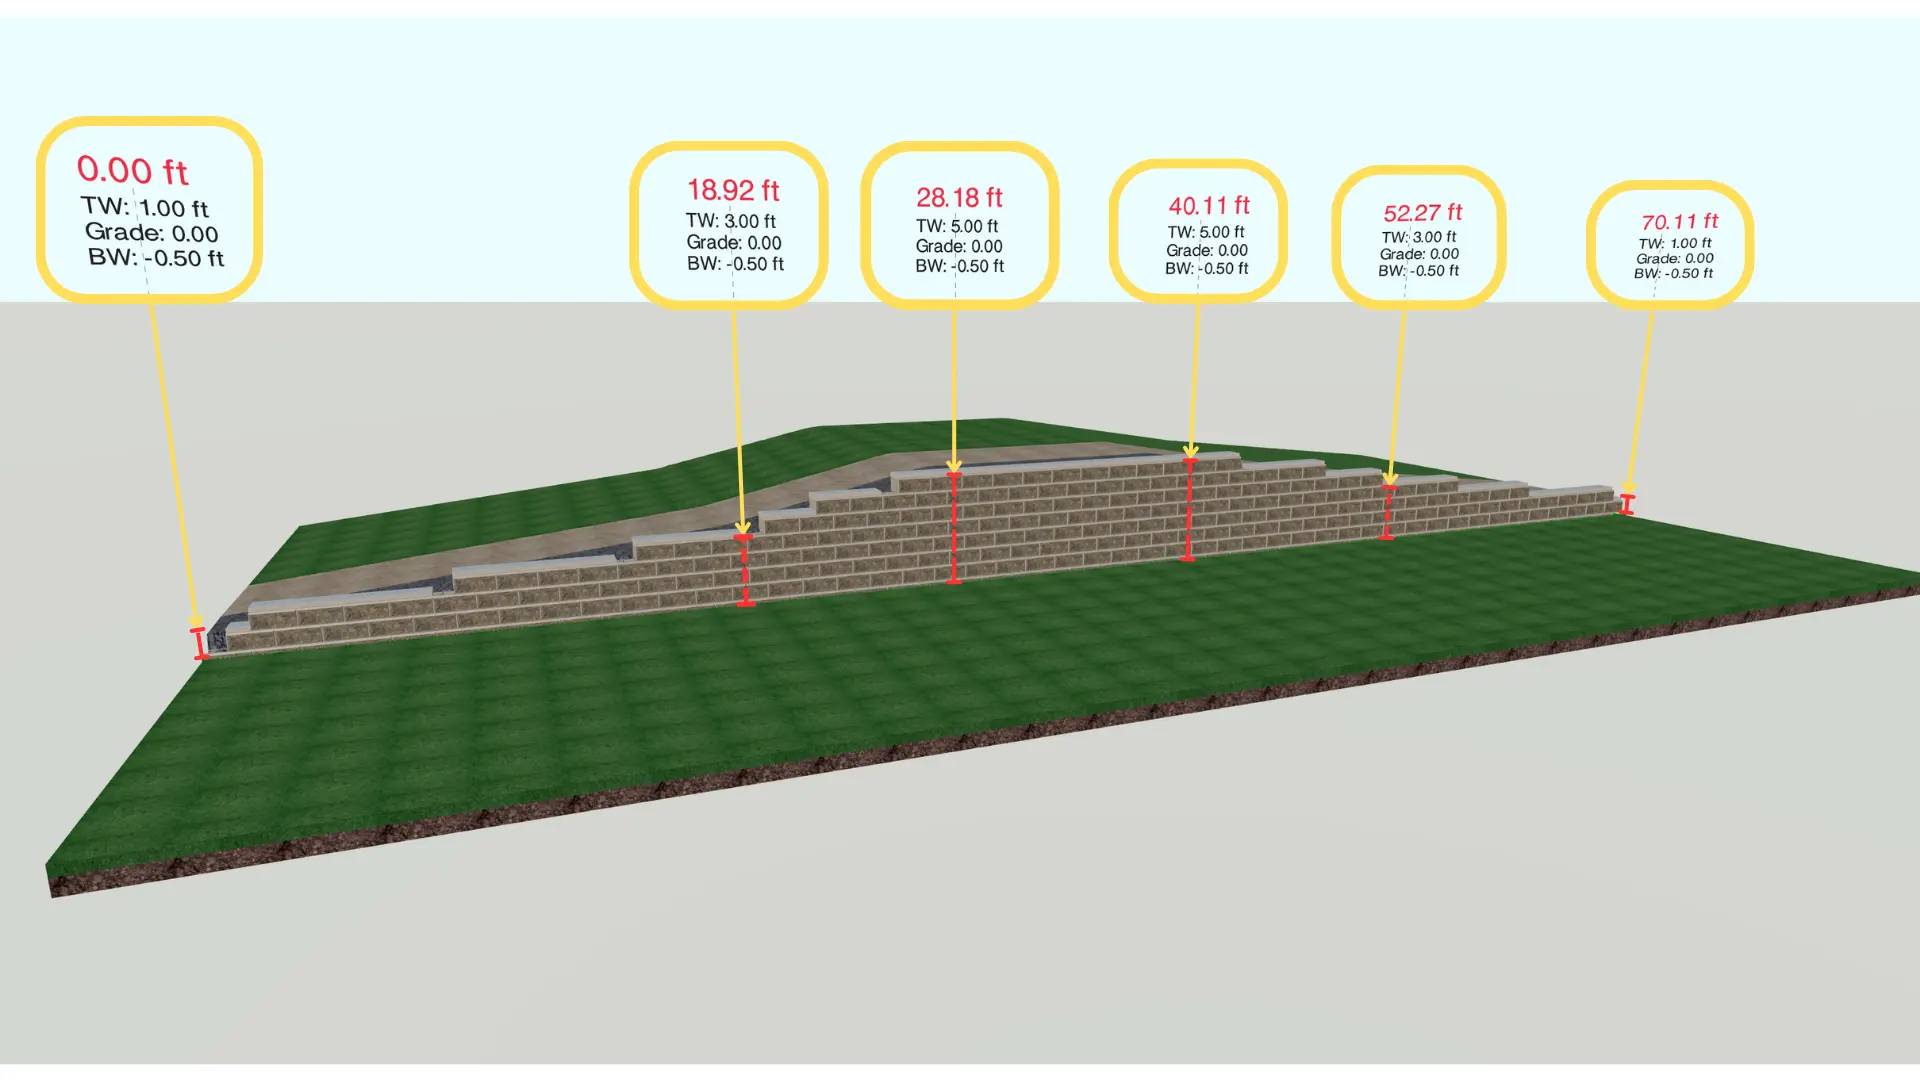
Station
()
|
Top of Wall
()
|
Grade
()
|
Exposed Height () | |
|---|---|---|---|---|
| 0 | ft |
ft |
ft |
|
| 1 | ft |
ft |
ft |
 Number of Courses:
| Station Point (SP) | Distance Between SP | Running Distance | Top of Wall | Finished Grade | Exposed Height |
|---|

map Create Plan View Layout
Generate a top-down plan view of your wall using the inputted wall length from your table. Add corners, curves, and customize the layout for your project.
| Wall | Soil Type | Surcharge | Max Height | Length | Plan View |
|---|
| Material | Quantity | Unit | Overage % | Total |
|---|---|---|---|---|
Geogrid in slope |
||||
| Item | Quantity | Unit | Overage | Total |
|---|---|---|---|---|
| Drain Pipe T | each | |||
| Sleeve-It | each | |||
| Wall Drain Pro | each |
Use this table to track equipment costs for your project.


